Sugar Roll Out Cookies + Royal Icing (vegan)
Over the past year, I've been practicing decorating cut out cookies. I used this recipe from bakeat350. It is perfection! No chilling needed, and the cookies and dough can both be frozen. So when I went vegan, I adjusted the cookie recipe so that I could keep practicing my icing skills. Warning:this recipe is far from healthy!! 😂

This recipe has no special ingredients. The secret is cold butter! Vegan butter, of course. It is important that it is cold. This means the dough won't be too soft, aka no chilling required before baking. Makes the whole cookie process so much easier!

The original recipe calls for almond extract in addition to vanilla extract. SO. GOOD. But I've found they're just as good without the almond. You can leave it plain vanilla too. You could even add whatever flavor/extract you want. Almond, lemon, orange, peppermint, etc. Get creative!!

I decided to go simple this go round. Tulips and butterflies (cookie cutters from Michael's) and a cute heart one I have from a kit. Especially if you're just starting to practice decorating, I would go with simple designs. Squares, hearts, circles. Just practice outlining them and filling them in. Even after a year, icing is a struggle for me!

So no chilling required. But, if you're doing any shape besides a circle, you'll probably want to freeze the cookies for up to five minutes before baking them. This way, you can be extra sure they keep their shape and don't grow too much. I just stick the parchment paper in the freezer with the cookies on top, then place the whole thing back on the pan after about 3-5 minutes.

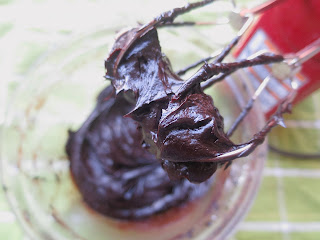
Back when I was just exploring the world of cookie decorating, I watched a whole bunch of videos on perfecting your royal icing. I used meringue powder for a long time, which worked well. It's not vegan of course, so I switched to using aquafaba as my thickener instead. But eventually, I just started using water and powdered sugar. It's THAT simple! No egg whites, cream of tartar, meringue powder, etc. Nothing fancy at all. The amount of water you use determines the consistency by itself. You can of course add other ingredients if you're going hardcore, but I figured these two simple ingredients would work perfectly since I was just decorating cookies for fun.

So decorating the cookies seems intimidating, right? But it's just like decorating anything else - cakes, cupcakes, and so on. It wasn't as hard as I had worked it up to be, but it certainly took practice. Start slow and simple, and don't place too much pressure on yourself. The best way is to create a little border around the cookie, to act as a sort of dam. Then flood the middle once the border is dry. You can actually see the borders in my pictures to get a better idea.
For fun, here's a picture of the first cookies I decorated...

Check out the recipe below for detailed instructions and measurements. Enjoy, and get decorating!


This recipe has no special ingredients. The secret is cold butter! Vegan butter, of course. It is important that it is cold. This means the dough won't be too soft, aka no chilling required before baking. Makes the whole cookie process so much easier!

The original recipe calls for almond extract in addition to vanilla extract. SO. GOOD. But I've found they're just as good without the almond. You can leave it plain vanilla too. You could even add whatever flavor/extract you want. Almond, lemon, orange, peppermint, etc. Get creative!!

I decided to go simple this go round. Tulips and butterflies (cookie cutters from Michael's) and a cute heart one I have from a kit. Especially if you're just starting to practice decorating, I would go with simple designs. Squares, hearts, circles. Just practice outlining them and filling them in. Even after a year, icing is a struggle for me!

So no chilling required. But, if you're doing any shape besides a circle, you'll probably want to freeze the cookies for up to five minutes before baking them. This way, you can be extra sure they keep their shape and don't grow too much. I just stick the parchment paper in the freezer with the cookies on top, then place the whole thing back on the pan after about 3-5 minutes.

Back when I was just exploring the world of cookie decorating, I watched a whole bunch of videos on perfecting your royal icing. I used meringue powder for a long time, which worked well. It's not vegan of course, so I switched to using aquafaba as my thickener instead. But eventually, I just started using water and powdered sugar. It's THAT simple! No egg whites, cream of tartar, meringue powder, etc. Nothing fancy at all. The amount of water you use determines the consistency by itself. You can of course add other ingredients if you're going hardcore, but I figured these two simple ingredients would work perfectly since I was just decorating cookies for fun.

So decorating the cookies seems intimidating, right? But it's just like decorating anything else - cakes, cupcakes, and so on. It wasn't as hard as I had worked it up to be, but it certainly took practice. Start slow and simple, and don't place too much pressure on yourself. The best way is to create a little border around the cookie, to act as a sort of dam. Then flood the middle once the border is dry. You can actually see the borders in my pictures to get a better idea.
For fun, here's a picture of the first cookies I decorated...

Check out the recipe below for detailed instructions and measurements. Enjoy, and get decorating!

Vegan Sugar Roll Out Cookies + Royal Icing
Makes about 50-60 cookies of varying sizes
Ingredients
For the cookies (adapted from bakeat350):
- 1 cup (two sticks) of cold vegan butter, cut into cubes or chunks
- 1 cup granulated sugar
- 1/4 cup oil (I use canola)
- 3/4 tsp vanilla extract
- 1/2 tsp extract of choice (optional)
- 3 cups flour
- 2 tsp baking powder
For royal icing:
- 4 cups powdered sugar
- 5 Tbs water
Directions
- Preheat your oven to 350 degrees.
- Cream together the cold butter and sugar on low until completely smooth.
- Beat in the oil and extract(s) until smooth.
- Beat in one cup of the flour until combined, then another cup plus the baking powder, then the final cup. The dough should be smooth, but may need to be kneaded if it is at all crumbly. It can be chilled or frozen for later, but if not, move straight to rolling and cutting.
- On a lightly floured surface, gently role out the dough until it is about 1/4 an inch thick (adding flour to dough and rolling pin as needed). Cut out desired shapes and transfer them to a greased or lined baking sheet.
- Freeze any shapes that are not circles for up to five minutes. If you can't fit the cookie sheet in the freezer, put the cookies on parchment paper, then move the paper back to the pan. Freezing the dough helps them keep shape and prevent too much growth in the oven.
- Bake the cookies for 10-12 minutes, then set them out to cool.
- To make the icing, mix together the powdered sugar and water until it is combined and drips off the spoon in a quick, but smooth stream.
- If desired, separate the icing, and add different colored food gels for colorful cookies.
- Spoon the icing into piping bags, or use my favorite tool listed down below.
- Once the cookies are cool, it's time to decorate! Create small borders around the cookies. Once that dries, flood the inside. You have total free range here to get creative! But here is a detailed video if you want more guidance. I used this channel a lot when I first started decorating.
- Let the icing completely set and dry - overnight is best, it does take a little while.
- Enjoy! This is such a fun recipe, and would be great to do at a party or with friends. See my list of recommended tools below as well 😀
-Squeeze bottles are a great alternative to piping bags. They're reusable and less messy.
-The pick tool in this pack is super useful for getting rid of little air bubbles and spreading icing to the edges of cookies.
-Food gels are best for coloring icing. They don't thin the icing like liquid ones do, and work like a charm!


Comments
Post a Comment